The guide to electronic prototyping: best practices, getting started, and mistakes to avoid
An idea leads to the birth of a new product. The process that the idea takes to move out of the person’s mind and take a physical form is called prototyping. Each new product needs multiple prototype iterations before acquiring the shape and dimensions that is ready for the mass population. Here is our guide to electronic prototyping: best practices, getting started, and mistakes to avoid.
Every passing prototyping phase brings the product to reality. And it is also a fact that no individual prototype is capable enough to bring out a commercial product without iterations to the market. Yes, there is ample availability of modern designing capabilities. Designers have access to computer-aided design that virtually builds up almost everything. However, it still does not match the fact that protoypes are necessary to check the invention’s applicability in the real world. And perhaps run a few test runs before mass manufacturing actually start.
As a designer, you learn something new with each prototype development. Even as the prototype is a tad better in certain aspects than its predecessor, it shorts the learning curve. When starting out, it is always advisable to start with the simplest, cheapest way to prototype your product. This approach helps you achieve several prototype iteration you should progress closer to your production-quality prototype.
We discuss some types of prototypes to get along.
Proof of Concept prototype
It is an early-stage prototype that provides basic product concepts and their effects on surroundings. The prototype seldom functions like the real product, but it helps understand the concept ina more tangible manner over just the computer screen design. It is ofcourse built with lowest possible cost in mind.
This type of prototype basics functions to address fundamental questions about whether the planned product can actually solve the intended problem. When you face a choice of ways to solve a target problem, yet you remain unsure of the best solution, proof of concept comes to the rescue. As it delivers definite insights about the answer.
In case you as a developer are not technically sound to build the prototype, you may want to skip this stage. Yet, if you have the time and resources, it does make sense to have a proof of concept prototype for your product before proceeding further.
Clone– Looks-like and works-like
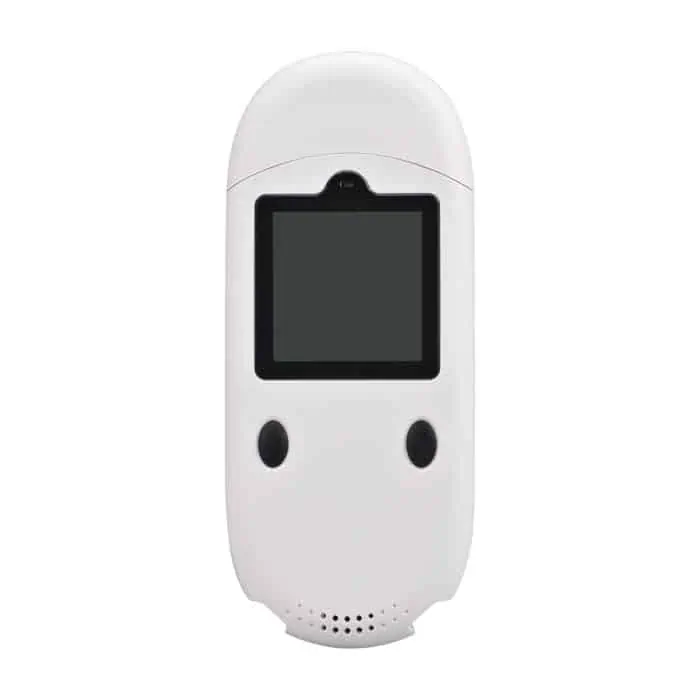
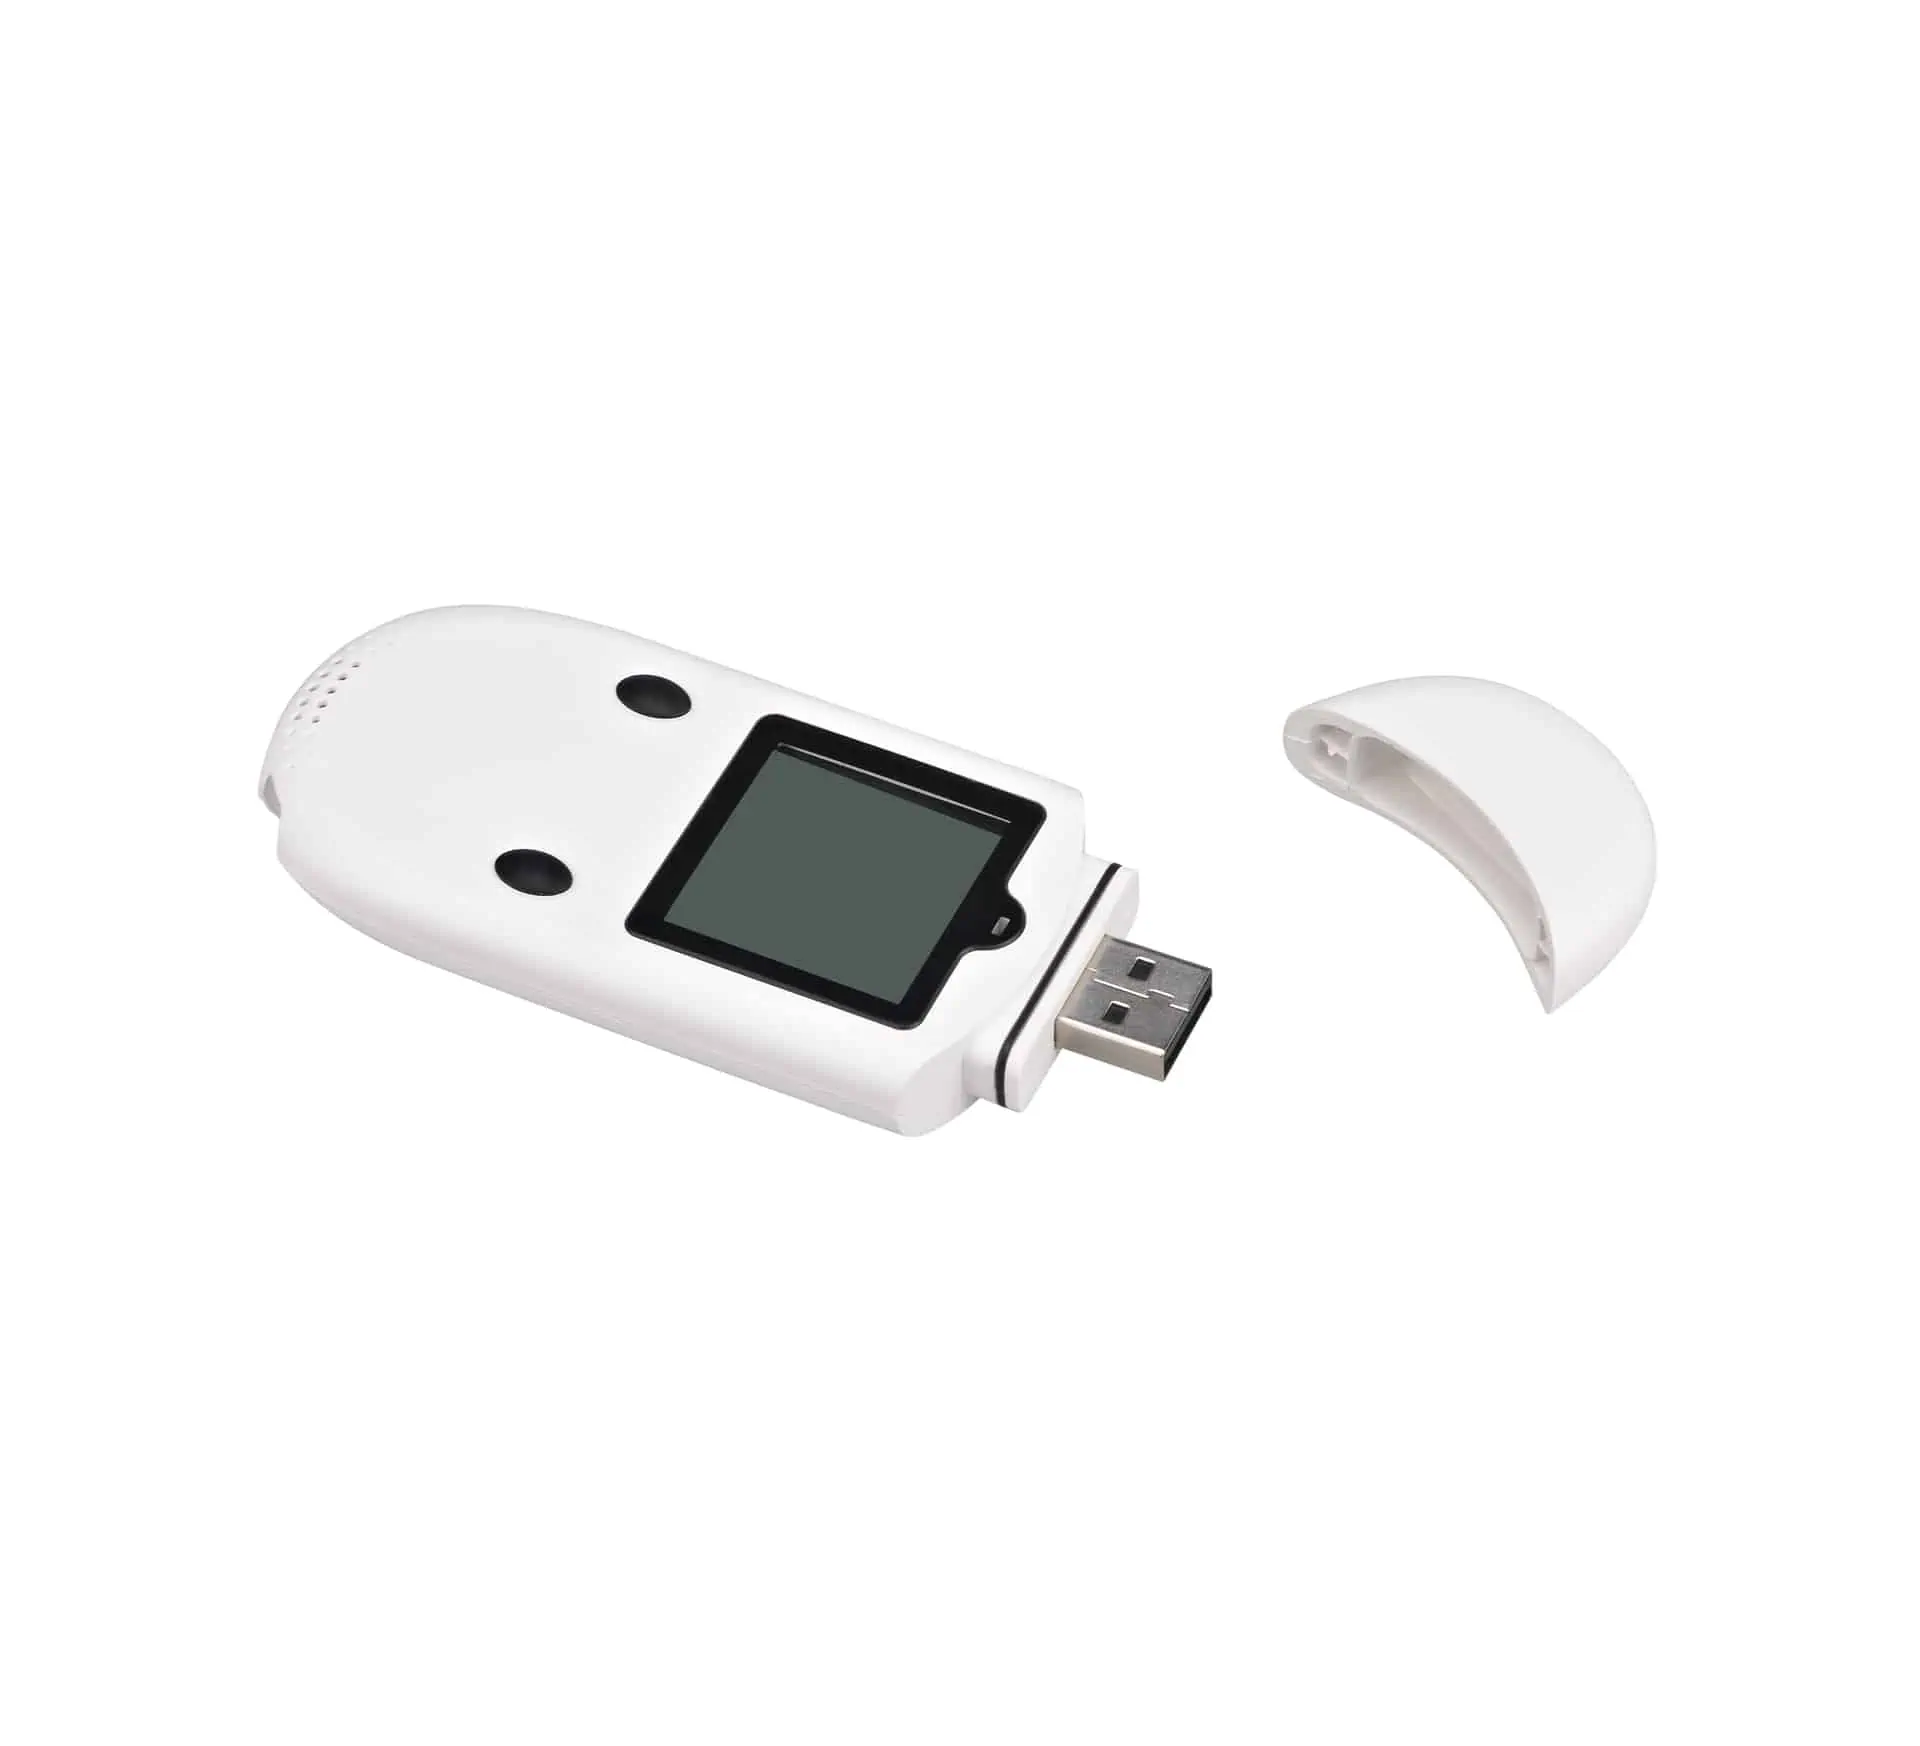
You have a product with the look and feel of the final product, however, it may not function as desired. This prototype will have an appearance similar to the final product. So you can use it for sampling and run a sensory analysis with test subjects.
Similarly, there is a prototype that resembles working the final product. But it may not have the styling and finish of the finished product.
When you are working with a looks-like prototype, you use prototyping techniques like foam, clay, 3D printing, CNC machining, and eventually injection molding. These techniques help form the looks and aesthetics of the final product. Nowadays you have the option to print a physical model with 3D printing technology. 3D printing gives out an exact replica of the final shape. Alternatively, you can choose any of the conventional design techniques like clay and foam. The idea is to start out with the most economical method and move to a more sophisticated designing once a perspective is built.
3D printing
This technique of building a 3-dimensional product prototype is primarily looked at as an additive process as it adds the material dimension to your design. 3D Printing can be divided into different types like Fused Deposition Modeling or FDM, which is commonly available in modern 3D printers. The molten plastic flows through the heated nozzle to give shape to your creation. Stereolithography or SLA is a less economical process used for sophisticated 3D printing at a professional level.
Here again, when it comes to choosing the 3D printing technology, one should stick to the most economical version first and then move to the professional level once the design is reaching the final stages.
Selective Laser Sintering (SLS)
It is the more advanced version of 3D printing where Laser beams are deployed to set materials layer by layer. Hence the shapes get formed each layer t a time. Metal-based prototypes can be built using SLS, and as the process is much more complex than simple 3D printing, it can opt when you reach Pro levels for your product.
CNC (Computer Numerical Control) machines
As we discussed additive processes above, CNC pertains to a subtractive process. The material segments or parts are selectively removed to achieve a final shape. As the process goes on removing parts, it starts with a single composite block of metal sculpted to form the final prototype shape.
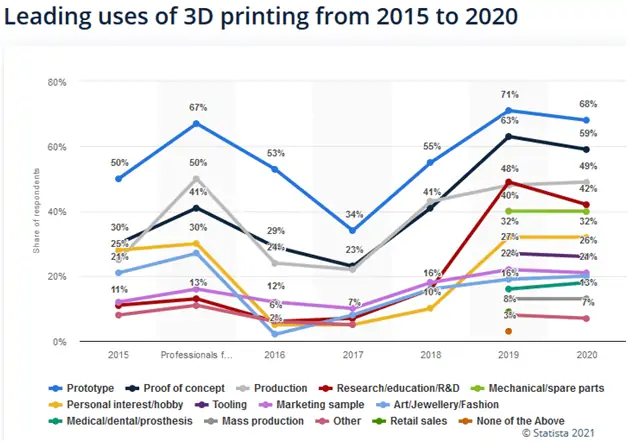
Source: https://www.statista.com/statistics/560271/worldwide-survey-3d-printing-uses/
Electronic Prototyping
Every electronic prototyping job should be planned to answer well-defined questions. And in a case where there are no big questions about your product’s functionality, you need to move ahead and start custom-designing the PCB. A custom PCB is the fastest route to market and sometimes not the economical one. Prototyping a custom Printed Circuit Board (PCB) will involve two steps primarily. The first is to produce a bare PCB, and the second is to solder all the components together.
As long as your PCB is not very complex, you can do it with simple designs that can be built manually. However, as your design develops a complex structure, you may need to outsource it to professionals. In case you do not make your own PCB boards, you may settle to use the same process to build your own prototype board.
PCB production involves following steps
- You need to have a laminate core that is built using woven glass epoxy materials. This forms the insulation medium that stays between the conducting layers. And since this will be the base board, it provides support to all other physical components of PCB.
- You can choose a single-sided board that has one laminate core with a copper layer on one side. Alternatively, you can opt for a double-sided board with a laminate core fitted with copper layers on each side. Even better, depending on the complexity of your PSB design, multiple layer boards of stacked-up alternating copper layers with laminate core layers.
- When designing each of the layers, one should pay attention to each of the conducting copper layers. They can be plotted using a laser on film and light-sensitive chemicals. High-intensity ultraviolet rays are then projected onto to the copper layers that shine through the film. Thereby hardening the chemical layer (also known as ‘Resist’).
- Later any of the leftover resist layers are removed. This process involves the removal of unhardened resist by using a chemical solution that removes the waste resist. The hardened resist material will be present only on the desired copper traces and pads. Further, this intermediate prototype product is subjected to a different chemical to remove any exposed copper that was not covered by the resist. Then the hardened resist layer is removed. This results in achieving the desirable copper that goes to form the traces and pads.
- Further bonding is achieved by using a lamination process. The layers come together to form the stacked PCB, which is fully bonded.
- The drill is used to create holes through the PCB stack-up in order to get vias that connect signals on different layers of the PCB. It is advisable here that components from only Surface Mount Technology are used in order to minimize the overall soldering costs when the product goes for mass manufacturing.
- Copper deposition follows as the next step. The deposits are made on all exposed metal surfaces that may also include the holes’ inner walls. The copper is also electroplated onto all copper surfaces that still lye exposed.
- The prototype board can be passed through a reflow oven, which loosens the solder paste and forms a permanent electrical connection between the component and the PCB pads.
Prototyping is a long and tedious process that involves several iterations. It is a progressive process that evolves slowly to finally achieve the desired product. Patience is definitely a virtue when developing a product prototype.